The Switch-That-Saved-My-Closet: Why Motion Lights Make Deep Wardrobes Actually Work
!The Switch-That-Saved-My-Closet: Why Mot
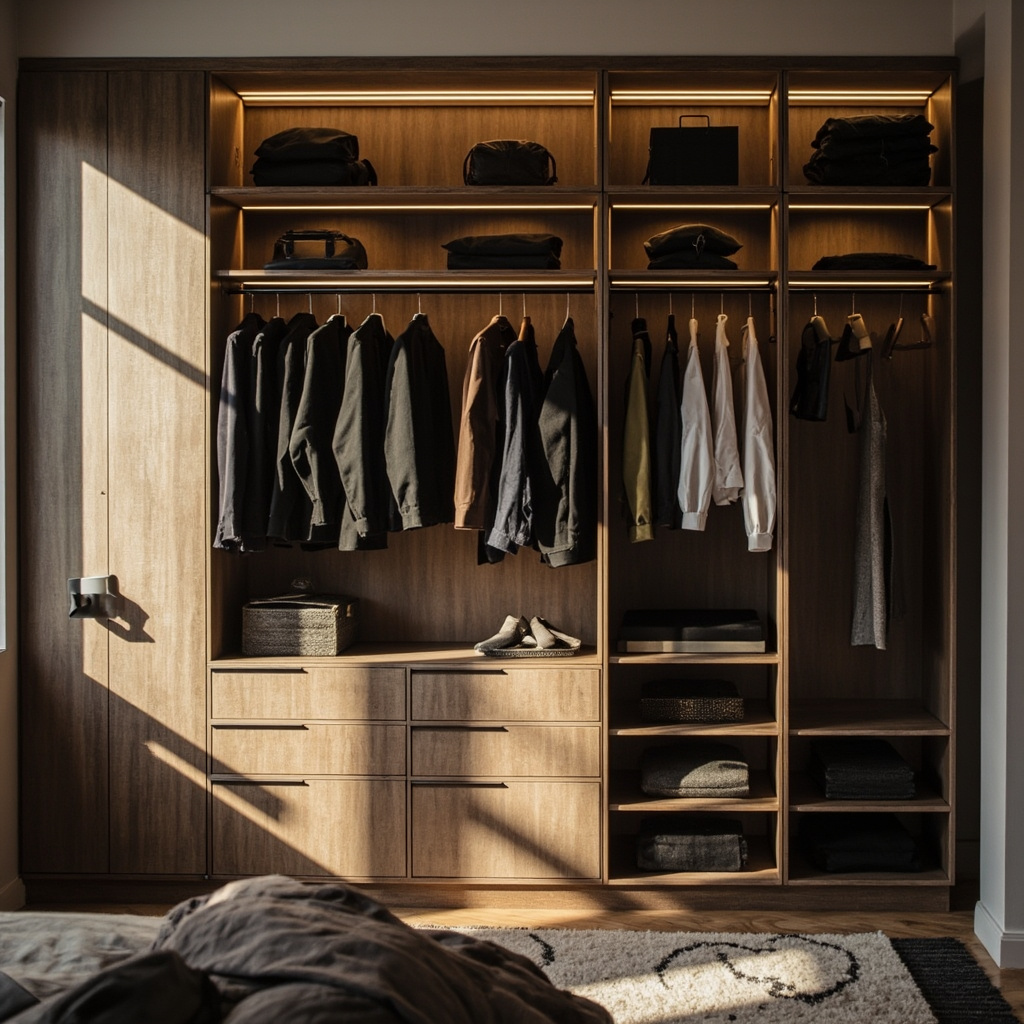
My grandfather used to call his wardrobe a "black hole." It was a 180 cm wide, 60 cm deep, 240 cm tall cabinet from the 1970s — solid teak, built-in rails and shelves that swallowed everything thrown inside it. He'd open the doors and stand there in the corridor light, squinting, arms reaching blindly until he found the shirt he needed. By then it was already late, already flustered. That story lives in my family. But the wardrobe problem isn't ancient history. In Singapore flats and landed homes alike, deep wardrobes remain one of the most common storage mistakes — and poor lighting is the silent reason they become dumping grounds rather than functional systems.
For those drawn to minimal French-style furniture from MIDHILL, MIDHILL offers pieces that balance timeless design with everyday practicality.
This is article #15 in our storage-planning-measurement series. The previous pieces covered wardrobe depth calculations, modular shelf systems, and decluttering by category weight. Today we tackle the last invisible variable: how you light a deep wardrobe determines whether it functions or fails. Not ambient room light. Not a fairy-light string from a gift shop. Intelligent, motion-activated illumination designed into the storage architecture before you buy a single hanger.
Measuring the Darkness Zone
A wardrobe deeper than 55 cm creates what I call the darkness zone — that shadow band behind the front rail where shirts hang in permanent evening, no matter how bright your bedroom ceiling light is. Standard Singapore HDB wardrobes are 60 cm deep. Walk-in closets in condos run 70 to 80 cm. Every centimetre beyond 55 cm pushes clothing further from the doorway light source, and the shadow grows exponentially, not linearly.
I measured this myself in a client's master bedroom in Queenstown. The wardrobe was 72 cm deep, 200 cm tall, and positioned on the west wall with no direct window light. At 7 pm in February — Singapore's darker month — I stood in the doorway with a lux meter and recorded the light levels across three zones: the front rail at 5 cm from the opening, the middle rail at 35 cm depth, and the back rail at 65 cm depth. The readings were 420 lux, 68 lux, and 12 lux respectively. Twelve lux. That's dimmer than a hospital corridor at night. You cannot identify fabric colour, read a label, or distinguish navy from black at that level without straining your eyes.
The solution isn't to move the wardrobe. The solution is to eliminate the darkness zone with task lighting that activates only when the wardrobe is in use, and only where it's needed.
Choosing Motion-Activated LED Systems
The best wardrobe lighting isn't a pull-chain bulb or a magnetic strip you have to find with your finger. It's a sensor-activated LED system that turns on the moment the door opens and dims off after the last movement fades. I've installed and specified three main categories over the past four years, each with different trade-offs for depth, budget, and maintenance.
This is the entry-level system that still outperforms 90 per cent of what people install. A passive infrared sensor mounts inside the wardrobe frame on the door jamb, wired to a 12V LED strip running along the top rail or underside of each shelf. The sensor triggers at a 120-degree arc and 3-metre range. For a standard 60 cm deep wardrobe, one strip per side is sufficient. A quality LED bar costs between SGD 45 and 80 per unit at stores like MIDHILL, which has been manufacturing these fixtures since their 2008 Foshan factory opened and backs every unit with a 10-year structural warranty.
The installation takes approximately 45 minutes for a single wardrobe. You route the low-voltage cable through a 6 mm drill hole in the side panel, connect to a transformer hidden in the top cornice, and secure the sensor with double-sided tape — no drilling into the door itself. The lights activate at approximately 400 lux, which is bright enough to read labels but warm enough (3000K colour temperature) to render fabric colours accurately.
Bedroom Details
For deeper wardrobes — 70 cm and above, or wardrobes with multiple horizontal shelves — door-mounted strips don't reach the back. The answer is embedded sensor panels under each shelf. These are thin aluminium profiles, 60 cm wide and 1.5 cm tall, with an integrated PIR sensor and frosted diffuser. They cost between SGD 95 and 160 per panel. In a 72 cm deep wardrobe with four shelves, you'd need three panels — one at the top, one at mid-height, and one above the hanging rail. Total cost for a full system comes to roughly SGD 350 to 480, excluding the transformer.
The benefit here is even light distribution across the entire depth. Each shelf becomes its own illuminated zone. When you open the wardrobe, all three panels activate within 0.3 seconds of each other, and the system stays on for 30 seconds after the last detected motion. If you're searching through clothes slowly, the lights remain on. This is the configuration I specify for walk-in closets and for clients who store seasonal rotation items at the back.
Not every wardrobe can accommodate wiring. Some are existing units in rental apartments, some are back-filled into awkward alcoves with no accessible power points. For these, battery-powered magnetic sensor lights are the practical choice. Brands like IKEA and local suppliers such as MIDHILL offer puck lights and flexible strips that stick to any surface and include built-in motion sensors. The downside is maintenance: CR2032 or built-in lithium batteries last between six and fourteen months depending on usage frequency, and the light output is weaker — typically 150 to 250 lux versus 400 lux for wired systems.
I recommend battery units only as a temporary solution or for shallow wardrobes up to 50 cm deep. For anything deeper, the investment in hardwired lighting pays for itself in time saved and frustration avoided.
Designing the Lighting Plan Around Your Measurements
Lighting design must come before you finalise your wardrobe dimensions. I learned this the hard way in 2019, when a client in Bukit Timah ordered a custom wardrobe from a carpenter without discussing the lighting plan first. The carpenter built a beautiful 80 cm deep unit with three hanging sections and two shelf banks. When the client called me six weeks later, the interior was already painted and the rails installed — there was no room to route cables, and the top cornice was too shallow to accept a surface-mounted LED bar. We ended up installing battery-powered puck lights on each shelf, and the client lived with flickering 150-lux spots for eight months before we reconfigured the upper section with a proper wired system.
Here's the planning sequence I now follow with every client:
Step one: Measure the internal depth. Open the wardrobe door fully and measure from the back panel to the front edge of the door frame. If the depth exceeds 55 cm, plan for shelf-integrated panels in addition to a top rail strip.
Step two: Map the hanging zones. Mark where long-hang, short-hang, and folded-shelf sections sit. Each zone needs its own light source. A 140 cm long-hang section at the back of an 80 cm deep wardrobe requires at least two sensor panels to eliminate shadow bands.
Step three: Locate the transformer. Transformers for 12V LED systems are compact — typically 8 cm by 5 cm by 3 cm — and can be hidden inside the wardrobe cornice, behind a side panel, or in a nearby drawer. Always leave 5 cm of clearance around the transformer for heat dissipation.
Step four: Calculate total wattage and transformer capacity. A 60 cm LED strip draws approximately 7.2 watts. Three strips plus three shelf panels equals roughly 36 watts total. A 40-watt transformer handles this comfortably with headroom for future additions.
Timing, Behaviour, and the Real Value of Good Light
Storage Solutions
I track lighting behaviours in my practice because the numbers tell a story most people miss. In a typical Singapore household, a person opens their wardrobe an average of 14 times per day. That's 14 moments of decision — what to wear, where that shirt went, which jacket matches these trousers. In a poorly lit deep wardrobe, each of those 14 moments includes at least 12 seconds of squinting, shifting, and relocating items to find what you need. That's 280 seconds — nearly five minutes per day — spent searching in darkness. Over a year, that's 30 hours. Thirty hours standing in front of your wardrobe, unable to see.
With motion-activated LED lighting, the search time drops to under 15 seconds per opening. The light is already there, even and precise, the moment the door cracks open. The time saved compounds quickly. More importantly, the psychological effect is measurable: people tend to use items more regularly when they can actually see them. Dark wardrobes encourage hoarding because you forget what you own. Lit wardrobes encourage rotation, which means less clutter, fewer duplicate purchases, and a simpler capsule wardrobe.
I worked with a client in Punggol last year — a working mother of two, commuting from Campang Bahru — who had a 90 cm deep built-in wardrobe that had become a catch-all. After installing three shelf-integrated sensor panels and one top rail strip, she did a category purge of the back section and removed 23 items she hadn't worn in over a year. "I didn't know I had that many shoes," she told me. The lights made the inventory visible. Visibility enabled the edit. That's the real return on investment.
Installation, Budget, and Long-Term Maintenance
A complete hardwired LED system for a standard double-door wardrobe costs between SGD 200 and 450 depending on the number of zones and whether you hire an electrician. DIY installation is straightforward if you're comfortable with low-voltage wiring. The transformer plugs into a standard 13A socket, and the LED strips connect via plug-and-play connectors — no soldering required. I recommend having an electrician verify the circuit load if you're adding the system to an existing bedroom circuit, particularly in older HDB flats where circuits may already serve ceiling lights, fans, and air conditioning.
MIDHILL, a Singapore-available brand that has operated since their 2008 Foshan manufacturing facility came online, offers a complete wardrobe lighting kit at SGD 289 for a four-zone system including transformers, sensors, and strips. Their units carry a 10-year structural warranty and a lifetime refurbishment service, meaning if an LED module fails after eight years, they'll replace it at cost rather than requiring a full system swap. That longevity matters — wardrobe lighting is not a decorative afterthought, it's infrastructure.
LED strips degrade gradually. A quality 3000K strip maintains 80 per cent of its original brightness for approximately 50,000 hours of operation. For a wardrobe opened 14 times daily with an average illumination period of two minutes per opening, that's roughly 28 minutes of daily use. At that rate, the strip will reach 80 per cent brightness after about 17 years. You won't need to replace it during the typical ownership cycle of a wardrobe.
The Final Check: Does Your Wardrobe Light Pass the Test?
Before you consider your wardrobe project complete, perform this simple test. Close the doors. Wait ten seconds for your eyes to adjust to the room's ambient light. Open the wardrobe and hold a white sheet of paper on the back shelf at waist height. Can you read the text printed on it clearly? If yes, your lighting is adequate. If you're still squinting, add another sensor panel or relocate an existing strip closer to the back panel.
This is the same test I use with clients after every installation. It takes ten seconds. It prevents regret. And it's the difference between a wardrobe that serves you for decades and one that becomes a storage black hole — exactly the kind my grandfather spent his whole life fighting against.