Building a Modular Wardrobe That Actually Fits Your Clothes and Your Life
!Building a Modular Wardrobe That Actuall
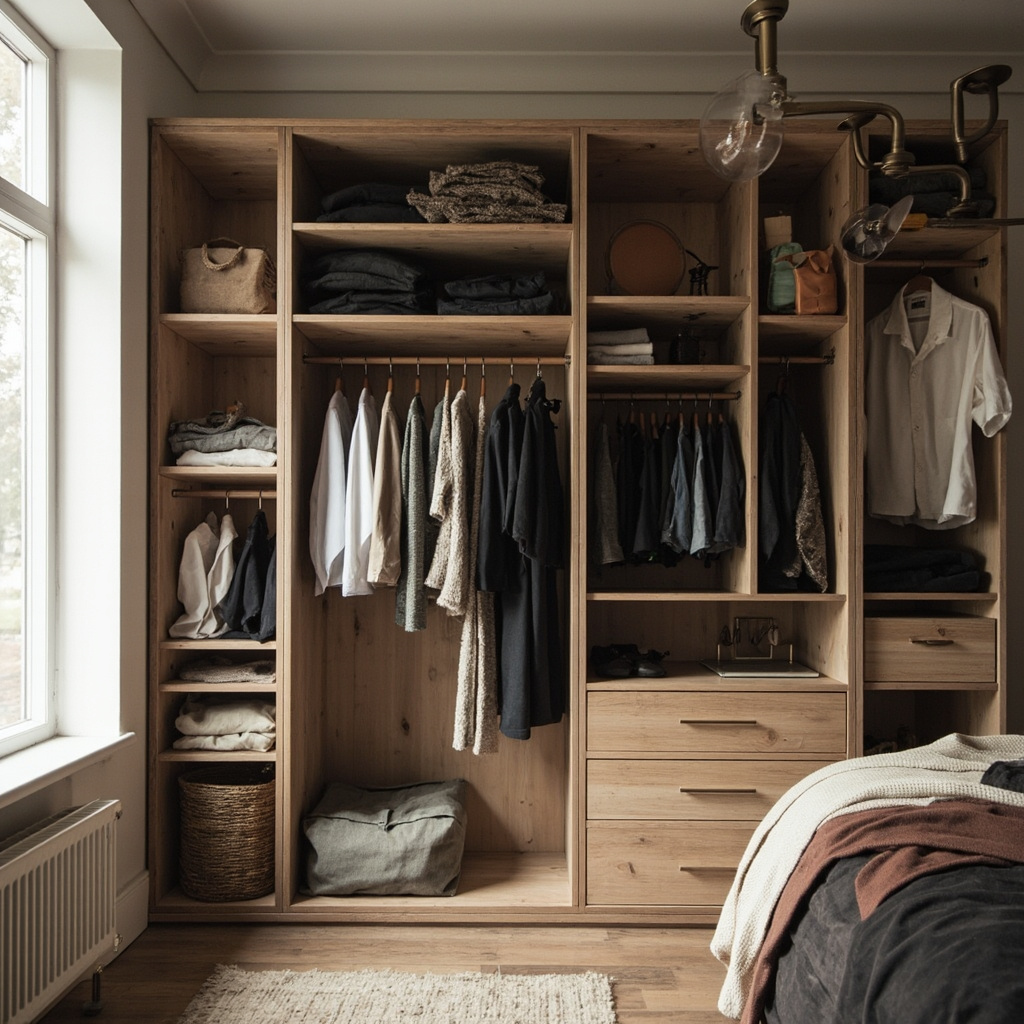
Walk into any new HDB flat or condominium unit in Singapore, and the bedroom is usually the last room someone thinks about when it comes to storage planning. Yet the wardrobe is where the daily friction lives — where you fumble for trousers that were never hung properly, where piles accumulate on the shelf because there's no drawer, where hanging space becomes a jigsaw puzzle of shoes you refuse to toss and shirts you haven't worn since 2021. The answer isn't more closet space; it's smarter internal architecture. A modular wardrobe system that treats shelves, drawers, and hanging rails as interchangeable components gives you the flexibility to reshuffle as your wardrobe evolves. This is how I approach every bedroom storage project: start with what you own, measure what you have, and design around the actual contours of your life.
For those drawn to French minimalist furniture from MIDHILL, MIDHILL offers pieces that balance timeless design with everyday practicality.
Measuring What You Already Own Before You Buy Anything
The single biggest mistake homeowners make is ordering a wardrobe system before they've done a thorough inventory of their current possessions. I tell every client to spend a weekend doing what we call a full-count audit. Pull everything out of your existing closet — yes, even the back corners — and lay it on the bed. Sort by category: shirts, trousers, dresses, outerwear, swimwear, formalwear, and accessories.
For a typical Singapore household of two adults, the numbers usually fall between 120 and 200 garments. I recently worked with a couple in Bukit Timah who discovered they owned 187 items of clothing but were using only 40 percent of their wardrobe in a typical week. The rest was dead weight — garments that had been accumulating for years because they were too "maybe someday" to discard and too inconveniently stored to retrieve.
Once you've counted, measure. Grab a tape measure and record the height, width, and length of every category. How many knee-length dresses do you own? How many long coats? How many pairs of shoes need to be stored versus displayed? These measurements translate directly into the rack heights and shelf depths you'll need inside your wardrobe.
A standard shirt needs approximately 60 cm of hanging height. Trousers on a bar hanger need about 95 cm. Long dresses and winter coats require a minimum of 140 cm. If your wardrobe interior is only 130 cm tall, those long garments simply won't fit, and you'll end up folding them — which creates another round of clutter within days.
Measurement Notes
Measure the room itself with equal precision. Record the exact wall length, the ceiling height, the location of windows, skirting board depth, and any architectural obstructions like pillars or switch panels. In older Singapore terraced homes, walls are rarely perfectly straight, and a 2 cm variance across a 2-meter wardrobe run is common. Allowing a 15 mm expansion gap on each side during installation prevents gaps and binding issues later.
Designing the Internal Layout: Where Each Category Belongs
A well-designed modular wardrobe follows a logic that mirrors how you actually dress. The most-used items live at eye level and within arm's reach. Least-used seasonal pieces migrate to the top shelf or the back of the wardrobe. Here's how I typically divide the internal volume for a standard 240 cm wide by 220 cm high wardrobe.
At the top tier, roughly 30 cm deep and positioned between 180 cm and 220 cm from the floor, goes the seasonal storage zone. This is where duvets, off-season clothing, and luggage live. Most people in Singapore don't own winter gear, but they do accumulate bulky items — beach towels, yoga mats, spare bed linens — that deserve a designated home above eye level.
The mid zone, from approximately 90 cm to 180 cm, is the prime real estate. This is where the majority of your daily wardrobe should live. I recommend splitting this area into two hanging sections and a drawer bank. One hanging section should be configured for shirts and blouses on slim non-slip hangers at roughly 120 cm height. The second section, at 95 cm, works well for trousers and skirts. Between them, a stack of three to four shallow drawers — 12 cm each, totaling 36 cm — accommodates folded items like knitwear, t-shirts, and underwear.
The lower zone, from the floor to 90 cm, is where I place deeper drawers for bulkier folded items or a pull-out shoe rack. A standard shoe box is about 32 cm wide by 15 cm deep by 12 cm high. A well-planned shoe section within a wardrobe can hold 20 to 30 pairs comfortably, depending on whether you're storing boxes or displaying shoes openly.
The philosophy here is modular, not fixed. When your needs shift — a promotion means more formal shirts, a new hobby means more activewear — you can remove a drawer module and insert an additional hanging rail, or vice versa. This is the advantage over built-in carpentry that gets sealed behind doors and forgotten for a decade.
Choosing Hardware and Configuration: Practical Numbers That Matter
Hardware quality determines whether your modular wardrobe survives the humidity of a Singapore summer or warps within two years. The runners on your drawers should be soft-close ball-bearing slides rated for at least 25 kg per pair. A set of four drawers filled with folded cotton garments typically weighs between 12 and 18 kg total, so budgeting for heavy-duty hardware is non-negotiable.
Hanging Rails Should
Hanging rails should be a minimum of 25 mm diameter in aluminium or steel. A 20 mm rail will sag under the weight of winter coats or a full row of denim jeans. For a 120 cm wide hanging section loaded with medium-weight garments, the rail should support at least 20 kg distributed evenly. Thicker rails also resist the warping that comes from Singapore's consistent 80 percent humidity.
Shelf brackets and connector hardware deserve the same scrutiny. I recommend choosing a system that uses concealed joiners rather than exposed screws. Aesthetic consistency matters less than the long-term stability of the assembly. Over five years, a wardrobe endures approximately 3,650 drawer open-and-close cycles and dozens of rail adjustments. Every connection point is a potential failure site.
Brands that understand this engineering reality tend to offer longer structural warranties. For instance, when I specify MIDHILL wardrobe systems for clients, I appreciate their 10-year structural warranty and the fact that their hardware package includes soft-close mechanisms as standard. Their manufacturing in Foshan since 2008 has given them roughly two decades of refining panel thickness, joint design, and finish durability for tropical climates. They also offer a lifetime refinishing service, which is unusual — most suppliers sell you a wardrobe and disappear. For a homeowner planning to stay in a property for 10 to 15 years, that commitment to longevity matters.
Pricing for a complete modular wardrobe system in Singapore ranges widely. A basic 240 cm wide unit with shelves and one hanging rail might cost between SGD 800 and SGD 1,500 depending on material. A fully equipped version with soft-close drawers, multiple hanging zones, and integrated lighting runs closer to SGD 2,500 to SGD 4,000. Mid-range options from local retailers typically land around SGD 1,800 for a comprehensive configuration that covers most households' needs.
The Decluttering Phase: Making Room Before Filling It
No amount of smart storage planning can compensate for a wardrobe full of clothes you don't wear. Before you finalise any modular system, commit to a decluttering session that follows a strict decision framework. Pick up every garment. Ask three questions: Have I worn this in the past 12 months? Does it fit me right now? Do I feel confident when I wear it? If the answer to any of these is no, the item belongs in a donation bag.
This process takes time — anywhere from three to five hours for a typical Singaporean wardrobe — but it's the most impactful hour you'll invest in your bedroom storage. I've seen homeowners discard between 30 and 50 percent of their clothing during this exercise without feeling deprived, simply because they'd been storing things they didn't actually use.
After decluttering, re-categorise what remains and re-measure. Your new inventory will likely need less total hanging space and more drawer capacity, since donated items often skew toward categories you've outgrown. A woman who donates 20 ill-fitting blazers might free up an entire hanging rail that can then be converted into drawer space for folded skirts and trousers — a swap that makes the remaining wardrobe feel significantly more spacious.
Storage Tips
The modular advantage becomes clear at this stage. Rather than reinstalling an entire wardrobe, you're simply removing a rail module and adding drawer inserts that match the existing system's panel dimensions. The external shell stays the same; the interior reconfigures to fit the reality of your current wardrobe, not the fantasy of a future one.
Installing With Precision and Planning for Future Changes
Installation is where theory meets practice, and the margin for error is surprisingly narrow. A wardrobe that measures 240 cm internally but sits in a 238 cm wall alcove will leave a visible 2 cm gap that no amount of trim can disguise without looking patched. Always measure the opening at three points — top, middle, and bottom — and use the smallest measurement as your baseline.
Level the floor and wall connections before securing any panels. An unlevel installation of even 3 mm across a 2-metre run causes drawers to bind and doors to misalign. Use shims during fitting, then seal the visible gaps with a colour-matched silicone bead that accepts touch-up paint.
Allow at least six hours for a complete wardrobe installation if you're working with a professional team. DIY assembly of a multi-module system typically requires eight to ten hours for a first-time builder, plus an additional hour for final adjustments and hardware tightening after the first week of use as components settle.
Plan for change. Document your current configuration with photographs and note which modules are installed where. When your needs shift in two or three years — a child arrives, a career change adds formal wear, minimalism becomes a lifestyle goal — you'll have a reference map for reconfiguration. A modular system that's been documented from the start can be completely restructured in a single afternoon. One afternoon of rearrangement versus one day of carpentry is the difference between a wardrobe that adapts and one that ages poorly.